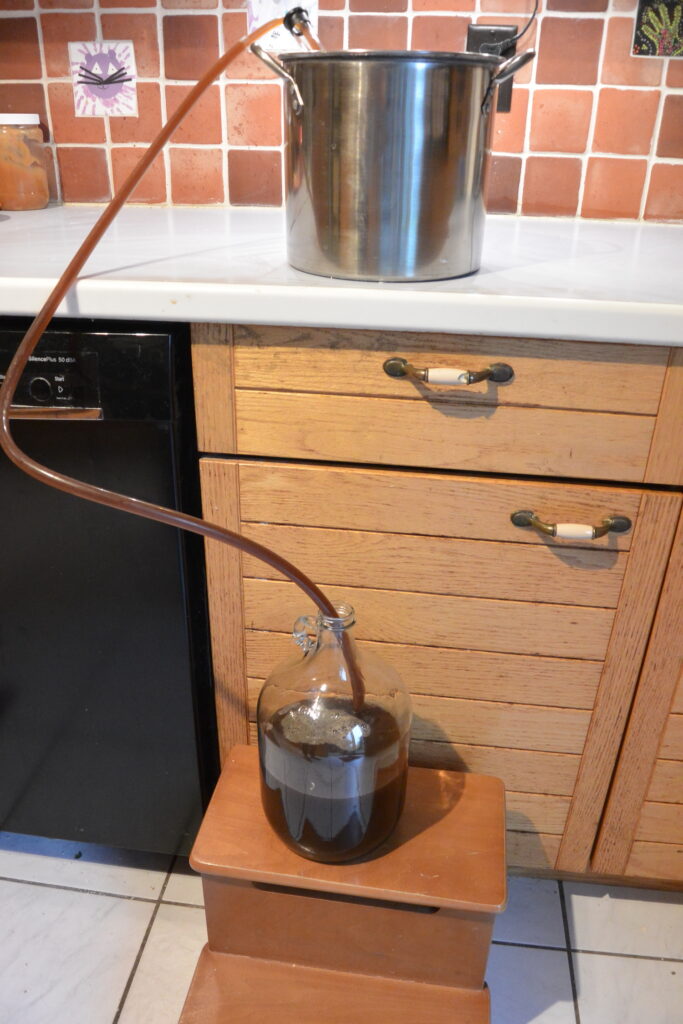
The trick to siphoning is to put the receiving vessel lower than the source vessel like so:
Once the flow of liquid starts, gravity takes over. You just have to keep an eye out for overflow, especially when you’re bottling. (This example doesn’t have a bottling wand attached.)
To start the flow, you’ll need to give the siphon a few pumps as in this example with our Braggot kits:
When you get ready to bottle and to use the bottling wand, practice with some plain water first to get the hang of it.
If you have trouble taking the tube off of the siphon, run it under hot water. That should make it easier to get them apart.
The bees have been busy this spring and summer, and treated us with a decent crop of light-colored, and quite floral honey. The Summer Honey Mead Magic kit and booster packs are now available, but quantities are limited!
We started a batch of mead from this blend; it’s going to be a very light-colored beverage, probably with some light floral notes. Try some for yourself and see!
Today we unveil a new section of the Mead Magic site – the Brewer’s Corner, where we talk about different mead recipes that we’re testing in our own kitchen. Our goal with the Brewer’s Corner is to craft variations on a straight mead that you can replicate in your own home with a Mead Magic booster pack and ingredients you can easily get from your grocer’s or a local homebrew store.
Our first recipe is a hopped mead, which uses a Spring Fruit booster pack, and the Fuggles hops. We’ve also got a Bochet (mead with caramelized honey) and a Wild Blackberry Melomel (mead with fruit) in the works, with tentative plans for a Maple Mead and Wild Blackberry Bochet in our future.
Hey, Kickstarter backers! Talking with some Mead Magic kit users this weekend, we realized that a lot of folks got a kit, but didn’t have time to use it — so many kits didn’t get used right away. That’s perfectly OK! The honey won’t spoil.
But that means you may not have wanted to take advantage of your exclusive Kickstarter discount we offered to our backers. Therefore, we extended your discount through the end of the year. Order a booster pack, or pick up a kit for a friend!
Hand-in-hand with the capping machine comes bottle caps!
Within the last couple of years, bottle caps have made a leap from plain and ordinary to fun — and useful. Various online services will print custom made caps, based on your uploaded image.
The super-handy thing about custom caps is that, assuming you print different caps for different meads, you can tell what brew is in your bottle at a quick glance.
Depending on how you bottle, caps might be “necessary” but custom-printed ones definitely fall under “fun but superfluous”.
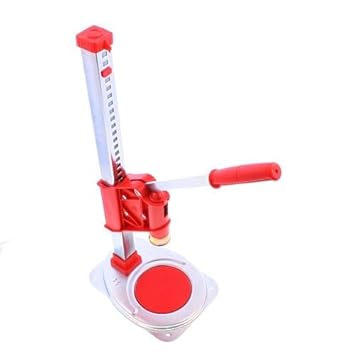
Getting your brew into the bottle is pretty easy, but then you need to close it up so it can age nicely for a few months. A 12-ounce beer bottle makes a nice drink for two, and to close that up you need a capping tool.
Capping tools come in different sizes and prices. The style below has lasted us through capping hundreds of bottles, and it still going strong. It requires only one hand to operate the capper, leaving the other hand free to hold your bottle.
A few years ago, this would have been “necessary” but now, with a growing availability of self-capping bottles (which we use in the deluxe kits), a capping tool isn’t quite as critical as it once was.
The bottling wand goes hand-in-hand with last week’s auto-siphon. With the auto-siphon to start your liquid flow, attached the bottling wand to the other end. The bottling wand has a spring-loaded tip that, when you press it, lets your new mead flow. Lift up the wand, and the flow stops.
So instead of stopping the flow with your fingers between bottles (tasty, but sometimes a touch messy), the bottling wand makes it easer. Again, another “handy but not necessary” tool — but it sure is fun to use.
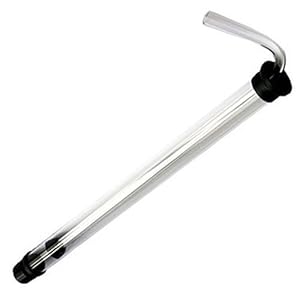
Your kit includes five feet of tubing to siphon and bottle with. If you graduate to five-gallon batches, consider the auto siphon.
The auto siphon basically starts your flow of liquid for you with a couple of quick pumps of the inner racking cane. Auto siphons are designed to draw in the liquid above your lees. This lets you draw off your new mead without too much sediment in it.
We file this under “handy, but not necessary”. You can use plain tubing for years (we did) to siphon and bottle. They run around $9, and the standard size (designed for 5 gallon carboys) are probably available in any local home brew store. you might need to shop harder, or online, for a mini-siphon to use in the gallon carboys.
We’re going to start a series on mead making tools of the trade that you haven’t seen in your kits. The reason why they’re not in your kits is that you don’t *need* them to make your first, single gallon of mead. But as you branch out, you may find some of these tools either indispensable or really handy.
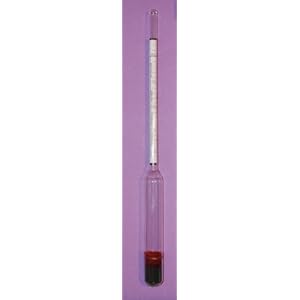
Standard hydrometer, available in local homebrew stores and online.
We’ve crafted a recipe for you that gives you a sweet mead with an ABV of about 14%. We know that your mead will have that much alcohol because of the first tool of the trade: the hydrometer. A hydrometer measures the sugars in your liquid. You take a reading of your must (which will be high in sugar) then your wine after the sugar has fermented. The difference will tell you how much sugar has turned into alcohol.
If you’re working from a tried-and-true recipe, then whoever crafted the recipe should be able to tell you what the ABV (alcohol by volume) of the final brew will be — as long as you follow that recipe exactly. If you use a different yeast, you could end up with different alcohol strength. A yeast like ours (Cotes de Blanc) will ferment up to about 14%, a champagne yeast can blow right by that and deliver an 18% ABV, and some beer yeasts won’t manage past 8%.
If you start experimenting with mead, then a hydrometer will be a “must have” in your mead making tool kit. Sugar is crucial to fermenting, and the hydrometer will be the tool to let you control it. A hydrometer runs between $5-$10, and will be available at your local homebrew store, and many places online.
Exciting news! We have secured a LIMITED supply of orange blossom honey for our booster packs. Orange blossom honey has a floral, citrus aroma, with a deep amber color and makes a wonderful mead. An Orange Blossom mead took silver at the 2013 Mazer’s Cup International.
Our orange blossom honey comes from HoneyRock Farm, in Ithaca, NY. The Hilkers overwinter their bees in Florida. There, they put the bees to work pollinating in the orange orchards. Bill and Sue don’t pasteurize their honey, so you get the full, rich flavor of nectar from the Florida orange trees.